
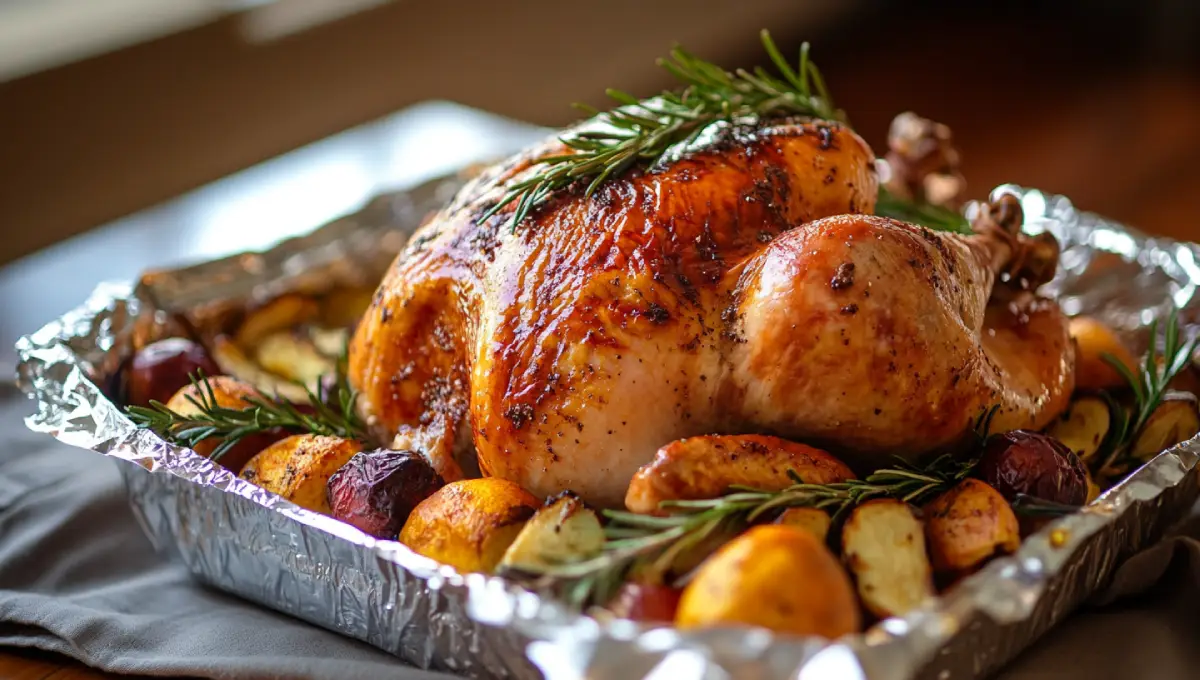
Cooking a turkey roasted in a bag is a foolproof way to get a juicy, flavorful bird with minimal effort. This method locks in moisture, enhances flavor, and reduces cleanup. Whether you’re preparing a Thanksgiving feast or a simple family dinner, using an oven bag ensures a tender turkey with a golden-brown finish.
In this guide, you’ll learn everything from choosing the right turkey to seasoning it perfectly and roasting it to perfection. We’ll also cover common mistakes, expert tips, and FAQs. Let’s dive in!
Why Roast a Turkey in a Bag?
Many home cooks hesitate to try the turkey roasted in a bag method, thinking it might make the bird soggy or prevent browning. However, this technique has several advantages that make it a top choice for both beginners and seasoned chefs.
What Is an Oven Roasting Bag?
An oven roasting bag is a heat-resistant bag made from special plastic designed to withstand high temperatures. It traps steam while cooking, keeping the turkey incredibly moist. Popular brands like Reynolds Oven Bags are specifically designed for roasting meats, ensuring safe and even cooking.
Advantages of Roasting Turkey in a Bag
- Juicier Meat: The trapped steam naturally bastes the turkey, keeping it moist throughout the cooking process.
- Faster Cooking: The bag helps distribute heat evenly, reducing cooking time by about 30 minutes compared to traditional roasting.
- Less Mess: Since all the juices stay in the bag, there’s minimal splatter inside the oven, making cleanup a breeze.
- No Need for Basting: Unlike traditional roasting, the bag keeps moisture locked in, eliminating the need for frequent basting.
- Even Browning: Contrary to popular belief, a turkey roasted in a bag can still develop a golden, crispy skin, especially with proper preparation.
Common Misconceptions About Cooking Turkey in a Bag
- “The turkey won’t brown.” – If you coat the skin with butter or oil before sealing the bag and cut small vents to release excess steam, the turkey will brown beautifully.
- “Plastic bags aren’t safe in the oven.” – Oven bags are made from food-safe, heat-resistant material designed for high temperatures. They won’t melt or release harmful chemicals.
- “It won’t taste as good as a traditionally roasted turkey.” – Many chefs prefer this method because it keeps the turkey tender and prevents drying out, leading to a flavorful and juicy result.
Using an oven bag for roasting turkey is an easy, reliable method that guarantees success. In the next section, we’ll go over how to choose the right turkey and ingredients for the perfect roast.
Choosing the Right Ingredients and Tools
Before you start cooking, it’s important to pick the right turkey and gather the necessary tools. A turkey roasted in a bag turns out best when you select a high-quality bird and prepare it with the right seasonings and equipment.
Selecting the Perfect Turkey Size for Bag Roasting
Not all turkeys fit well in an oven bag. Here’s how to choose the best size:
- Smaller turkeys (10-14 lbs): Cook faster and fit comfortably in most roasting bags.
- Medium turkeys (15-18 lbs): Still manageable, but make sure to use a large turkey-sized bag.
- Larger turkeys (19-24 lbs): Require extra care. Check the bag size to ensure it’s big enough to allow air circulation inside.
When buying a turkey, look for fresh or frozen options labeled “young turkey.” These are typically more tender. If using a frozen turkey, allow 24 hours of fridge thawing per 5 pounds before cooking.
Essential Ingredients for Flavorful Turkey Roasting
A turkey roasted in a bag needs simple but effective seasonings. Here’s a basic ingredient list:
- Butter or olive oil – Helps achieve a golden, crispy skin.
- Salt and black pepper – Enhances the turkey’s natural flavors.
- Fresh herbs (rosemary, thyme, sage) – Adds depth and aroma.
- Garlic and onion – Infuses the meat with a rich, savory taste.
- Paprika or poultry seasoning – Gives the turkey extra color and flavor.
- Lemon or apple slices – Adds moisture and a hint of citrus or sweetness.
Necessary Kitchen Tools and Equipment
Cooking a turkey roasted in a bag requires a few essential tools:
- Oven bag: Choose a heat-safe roasting bag that fits the turkey.
- Large roasting pan: Ensures even cooking and supports the bag.
- Meat thermometer: Confirms the turkey is fully cooked (165°F for the breast, 175°F for the thighs).
- Sharp knife and carving fork: Makes slicing easier.
- Kitchen twine (optional): Helps secure the turkey’s legs for even cooking.
With everything ready, it’s time to move on to the cooking process. In the next section, we’ll go through a step-by-step guide to roasting the perfect turkey in a bag.
Step-by-Step Guide to Roasting a Turkey in a Bag
Now that you have your turkey and ingredients, let’s get cooking! This step-by-step guide will ensure your turkey roasted in a bag turns out juicy and flavorful.
Preparing the Turkey: Cleaning and Seasoning
- Thaw the turkey (if frozen) completely before cooking. A partially frozen turkey won’t cook evenly.
- Remove the giblets and neck from the turkey cavity. These can be used for gravy.
- Pat the turkey dry with paper towels. Dry skin helps achieve better browning.
- Rub the turkey with butter or oil. Spread it evenly over the skin for flavor and crispiness.
- Season generously. Sprinkle salt, pepper, and other seasonings inside and outside the turkey. Add fresh herbs and garlic inside the cavity for extra taste.
Prepping the Roasting Bag: Flour, Venting, and Setup
- Sprinkle 1 tablespoon of flour inside the bag. Shake to coat the inside evenly. This prevents the bag from bursting.
- Place the bag in a roasting pan. Make sure the opening faces up for easy sealing.
- Put the turkey inside the bag. Breast side up for best results.
- Add aromatics around the turkey. Onion, garlic, and lemon slices will enhance the flavor.
- Seal the bag tightly. Use the provided tie or kitchen twine.
- Cut 5-6 small slits in the bag. This allows steam to escape, preventing too much pressure buildup.
Cooking Time and Temperature Guide
A turkey roasted in a bag cooks faster than traditional methods. Follow this chart for accurate cooking times:
| Turkey Weight | Oven Temperature (°F) | Cooking Time |
|---|---|---|
| 10-12 lbs | 350°F | 2 – 2 ½ hours |
| 12-16 lbs | 350°F | 2 ½ – 3 hours |
| 16-20 lbs | 350°F | 3 – 3 ½ hours |
| 20-24 lbs | 350°F | 3 ½ – 4 hours |
Place the roasting pan on the lowest oven rack to allow even airflow. Avoid opening the oven too often, as this can reduce heat and extend the cooking time.
Checking for Doneness: Safe Internal Temperature
The most accurate way to check if your turkey is fully cooked is by using a meat thermometer:
- Insert the thermometer into the thickest part of the breast. It should read 165°F.
- Check the thigh’s temperature. It should reach 175°F for perfect doneness.
- If the turkey isn’t done, reseal the bag and return it to the oven for another 15-20 minutes.
Once the turkey reaches the right temperature, let it rest for 20-30 minutes before slicing. This helps the juices redistribute, making every bite tender and flavorful.
if you’re interested in more delicious recipes, be sure to check out other meal ideas on their every tastes such as The Best Chicken Cream Cheese Recipe
Enhancing the Flavor of Your Turkey
A perfectly cooked turkey roasted in a bag is already juicy and delicious, but a few extra touches can take the flavor to the next level. From seasoning choices to crisping the skin, here’s how to make your turkey even more mouthwatering.
Using Herbs, Spices, and Butter for Maximum Taste
Seasoning is the key to making your turkey rich in flavor. While salt and pepper are essential, adding herbs and spices makes a huge difference. Here’s what works best:
- Butter or Olive Oil: Helps the seasonings stick while adding richness.
- Fresh Herbs (Thyme, Rosemary, Sage): Infuses the turkey with a classic holiday aroma.
- Garlic and Onion Powder: Enhances the savory taste.
- Paprika or Smoked Paprika: Adds color and a slightly smoky flavor.
- Citrus (Lemon or Orange Zest): Brightens the overall taste with a hint of acidity.
For best results, rub the turkey inside and out with butter and seasonings before placing it in the bag. This ensures that every bite is flavorful.
Stuffing vs. Aromatics: What Works Best?
Many people wonder if they should stuff their turkey roasted in a bag. While traditional stuffing is delicious, it can slow down cooking and increase food safety risks. Instead, try using aromatics inside the turkey cavity:
- Onions and Garlic: Deepens the flavor.
- Carrots and Celery: Adds a mild sweetness.
- Apple or Pear Slices: Creates a subtle fruity note.
- Fresh Herbs: Infuses the meat with fragrance.
These ingredients steam inside the turkey as it cooks, making the meat even more flavorful without the risks of stuffing.
How to Get Crispy Skin When Roasting in a Bag
One common concern is that a roasting bag may prevent the turkey skin from crisping. Here’s how to ensure a golden, crispy exterior:
- Dry the Turkey Well: Pat the skin dry with paper towels before seasoning.
- Use Butter or Oil: A thick layer helps the skin brown better.
- Cut Small Vents in the Bag: This lets steam escape, preventing the skin from getting too soft.
- Remove the Bag Near the End: During the last 15-20 minutes, carefully cut open the bag and expose the turkey to direct heat.
With these simple steps, your turkey roasted in a bag will have crispy, flavorful skin while staying juicy inside.
Troubleshooting Common Issues
Even with careful preparation, things don’t always go as planned. If you run into problems while roasting your turkey, don’t panic! Here’s how to fix common issues.
Why Did My Turkey Come Out Too Dry or Too Moist?
A turkey roasted in a bag is usually very moist, but sometimes it can turn out too dry or overly wet. Here’s why:
- Dry Turkey: Likely overcooked. Use a meat thermometer and remove the turkey from the oven as soon as the breast reaches 165°F.
- Too Moist or Soggy: The bag may have trapped too much steam. To fix this, remove the turkey from the bag in the last 20 minutes and let it crisp up in the oven.
What If My Turkey Isn’t Browning Enough?
If your turkey looks pale, try these fixes:
- Brush with More Butter or Oil: A second coat during cooking can help browning.
- Increase Oven Temperature in the Last 20 Minutes: Raising it to 400°F for a short time can enhance color.
- Remove the Bag Early: If the turkey looks too light 30 minutes before it’s done, carefully cut open the bag to expose it to direct heat.
How to Prevent the Bag from Melting or Bursting?
Although oven bags are designed for high heat, issues can still arise. Here’s how to prevent accidents:
- Use a Food-Safe Roasting Bag: Regular plastic bags or grocery store bags are unsafe for oven use.
- Coat the Bag with Flour: This prevents it from sticking to the turkey.
- Cut Small Vent Holes: Allows steam to escape and reduces pressure buildup.
- Keep the Bag Away from Oven Walls: Direct contact with hot surfaces may cause melting.
By following these tips, you’ll avoid the most common turkey roasting mistakes.
Storing and Serving Your Turkey
Once your turkey roasted in a bag is perfectly cooked, it’s time to carve, serve, and store any leftovers properly. Whether you’re preparing a holiday feast or a simple family dinner, these tips will help you get the most out of your turkey.
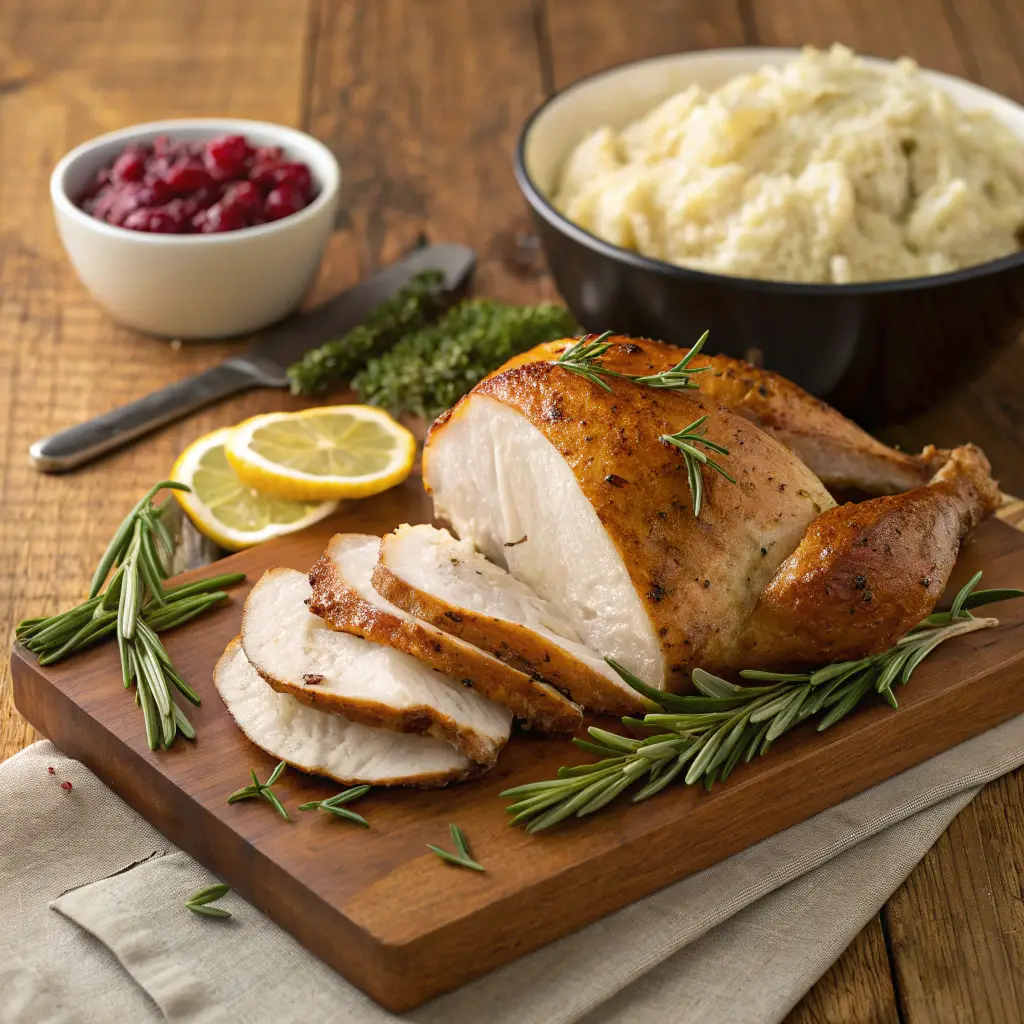
How to Properly Carve a Roasted Turkey
Carving a turkey may seem tricky, but with the right steps, it becomes easy:
- Let the turkey rest: Before carving, let the turkey sit for at least 20-30 minutes. This helps the juices settle, keeping the meat moist.
- Use a sharp knife: A long, sharp carving knife or an electric knife works best for smooth slices.
- Remove the legs and thighs: Cut where the leg meets the body. Gently pull it away and slice through the joint.
- Slice the breast meat: Cut along one side of the breastbone, then slice downward in even strips.
- Separate the wings: Find the joint connecting the wing to the body and slice through.
- Arrange on a platter: Place white and dark meat separately for easy serving.
For best presentation, garnish your turkey platter with fresh herbs, lemon slices, or cranberries.
Best Ways to Store Leftovers Safely
Leftover turkey roasted in a bag can be just as delicious the next day, but it must be stored correctly to stay fresh:
- Refrigerate within 2 hours: Let the turkey cool slightly, then store it in airtight containers.
- Slice before storing: Keeping the meat in smaller pieces makes it easier to reheat.
- Use within 3-4 days: Turkey stays fresh in the fridge for a few days, but after that, it’s best to freeze it.
- Freeze for long-term storage: Place turkey in freezer-safe bags and use within 2-3 months for the best flavor.
When reheating, avoid overcooking by using a microwave, stovetop, or oven with a bit of broth to keep the meat moist.
Creative Leftover Turkey Recipes
Leftover turkey roasted in a bag can be transformed into delicious new meals:
- Turkey and vegetable soup – A warm and hearty way to use leftover meat.
- Turkey sandwiches – Layer slices with cranberry sauce and stuffing for a tasty bite.
- Turkey tacos – Shred the meat and mix with spices for a quick taco filling.
- Turkey pasta – Toss into a creamy Alfredo or tomato-based pasta dish.
- Turkey salad – Mix with mayo, celery, and grapes for a refreshing lunch.
With so many options, your leftovers will never go to waste!
Frequently Asked Questions (FAQs)
Many home cooks have questions about making a turkey roasted in a bag. Here are the most common ones:
Yes! The oven bag traps steam, naturally basting the turkey while it cooks. This prevents the meat from drying out and makes it incredibly tender.
It’s not recommended. Stuffing slows down cooking and may not reach a safe temperature inside the bird. Instead, bake stuffing separately and serve it alongside your turkey.
Only if it’s an oven-safe roasting bag. Regular plastic bags will melt and release harmful chemicals. Always check the packaging to ensure it’s designed for high heat.
Nope! The bag locks in moisture, so there’s no need to baste. However, for a crispier skin, you can brush the turkey with melted butter before sealing the bag.
Use a meat thermometer to check the internal temperature:
–Breast meat should reach 165°F
–Thigh meat should reach 175°F
If the temperature is lower, return the turkey to the oven for more time.
A turkey roasted in a bag is one of the easiest ways to get a flavorful, juicy, and stress-free meal. With these tips, you’ll be able to cook, carve, store, and enjoy your turkey without any hassle.
Expert Tips for a Perfect Turkey Roasted in a Bag
Even though roasting a turkey in a bag is simple, a few expert tricks can make the process even easier and the results even better. Whether it’s achieving the perfect crisp or avoiding common mistakes, these tips will help you master the method.
Best Ways to Prevent a Soggy Bottom
A common issue with a turkey roasted in a bag is excess moisture pooling at the bottom. Here’s how to avoid that problem:
- Use a roasting rack: Placing the turkey on a rack inside the roasting pan keeps it from sitting in its own juices.
- Add a layer of veggies: If you don’t have a rack, arrange carrots, celery, and onions at the bottom of the bag to lift the turkey slightly.
- Vent the bag properly: Cutting a few small slits in the bag allows steam to escape, reducing excess moisture.
These small adjustments help ensure the turkey stays juicy without getting too wet.
How to Make the Meat Even More Flavorful
While the oven bag does a great job of locking in moisture, adding extra flavors will make the turkey even tastier. Here’s what to try:
- Dry brine overnight: Rubbing the turkey with salt and letting it sit in the fridge overnight enhances its natural flavors.
- Inject with broth or butter: Using a marinade injector, add extra moisture and flavor to the meat before roasting.
- Stuff with aromatics: Inserting fresh herbs, citrus slices, or garlic inside the cavity infuses the turkey with rich flavors as it cooks.
A few extra steps before roasting can take the taste to the next level!
Adjusting Cooking Times for Different Ovens
Not all ovens heat the same way. Here’s how to adjust your cooking time if needed:
- Convection ovens cook faster: Reduce the temperature by 25°F and check for doneness 30 minutes early.
- Older ovens may cook unevenly: Rotate the roasting pan halfway through if needed.
- Use a thermometer, not just time: Cooking times can vary, so always rely on an internal meat thermometer for accuracy.
By keeping an eye on the cooking process, you can ensure the turkey is cooked just right.
Flavor Variations for a Unique Turkey Roasted in a Bag
While the traditional turkey roasted in a bag is always delicious, you can add unique flavors to make your meal even more special. Here are a few creative seasoning ideas to try.
Garlic Butter Herb Turkey
For a classic, rich flavor, coat the turkey with a blend of butter, garlic, rosemary, thyme, and parsley. This gives the bird a golden, crispy skin while keeping the meat juicy.
For more recipe ideas, check out Roasted Butter Herb Turkey from Food Network.
Citrus and Honey-Glazed Turkey
Add a sweet and tangy twist by brushing the turkey with a mix of orange juice, lemon zest, honey, and a dash of cinnamon. This gives the turkey a caramelized glaze and a fresh, citrusy aroma.
Spicy Cajun Turkey
For a bolder taste, rub the turkey with Cajun seasoning, smoked paprika, cayenne pepper, and garlic powder. This creates a flavorful, slightly spicy crust that pairs perfectly with the juicy meat.
Maple and Mustard Glazed Turkey
Combine maple syrup, Dijon mustard, apple cider vinegar, and black pepper for a sweet and savory coating. The glaze caramelizes beautifully in the oven bag, enhancing the turkey’s natural flavors.
With these seasoning options, you can customize your turkey roasted in a bag to match any occasion or personal taste preference.
Pairing Your Turkey with Delicious Side Dishes
No turkey dinner is complete without the perfect sides. Here are some classic and creative pairings to serve alongside your turkey roasted in a bag.
Classic Thanksgiving Sides
- Mashed Potatoes & Gravy – Creamy potatoes with rich turkey gravy.
- Green Bean Casserole – A crispy, creamy favorite.
- Cranberry Sauce – The perfect sweet and tangy contrast to turkey.
- Stuffing (Baked Separately) – Herb-infused bread stuffing for a traditional touch.
Creative Side Dish Ideas
- Garlic Roasted Brussels Sprouts – Adds a nutty crunch.
- Sweet Potato Casserole – Topped with marshmallows for a touch of sweetness.
- Cheesy Cauliflower Bake – A low-carb alternative to mashed potatoes.
- Maple-Glazed Carrots – A simple but flavorful side.
These side dishes complement the rich, juicy flavor of turkey roasted in a bag, making your meal even more satisfying.
Final Thoughts on Turkey Roasted in a Bag
Why This Method is Worth Trying
A turkey roasted in a bag is one of the easiest and most reliable ways to get a juicy, flavorful meal without the hassle. This technique makes cooking faster, cleanup easier, and the turkey more tender than ever. Whether you’re a beginner or an experienced cook, using a roasting bag takes the guesswork out of making the perfect turkey.
A Quick Recap of Key Tips
To ensure success, remember these essential points:
- Choose the right size turkey for the oven bag.
- Season well with butter, herbs, and spices before roasting.
- Use a roasting rack or veggies to keep the turkey from getting soggy.
- Vent the bag properly to allow excess steam to escape.
- Check for doneness using a meat thermometer, not just the clock.
- Rest the turkey for 20-30 minutes before carving for the juiciest results.
By following these simple steps, your turkey roasted in a bag will be the star of any meal!
Print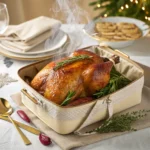
The Ultimate Guide to Turkey Roasted in a Bag
- Total Time: About 3 hours 15 minutes
- Yield: 10–12 servings 1x
- Diet: Gluten Free
Description
This turkey roasted in a bag recipe guarantees a juicy, tender, and flavorful turkey with a crispy golden skin. Perfect for holidays or any family dinner, it’s a foolproof way to get delicious results with minimal effort.
Ingredients
- 1 whole turkey (12–16 lbs)
- ½ cup butter (melted) or olive oil
- 2 tsp salt
- 1 tsp black pepper
- 2 tsp garlic powder
- 2 tsp onion powder
- 1 tsp smoked paprika
- 1 tbsp fresh rosemary (chopped)
- 1 tbsp fresh thyme (chopped)
- 1 tbsp fresh sage (chopped)
- 1 onion (quartered)
- 1 lemon (sliced)
- 3 garlic cloves (crushed)
- 2 tbsp flour (for the bag)
- 1 oven-safe roasting bag
Instructions
- Preheat the oven to 350°F (175°C).
- Prepare the turkey by removing giblets and patting it dry.
- Mix melted butter with herbs and spices, then rub the mixture all over the turkey.
- Place flour inside the roasting bag, shake to coat, and place it in a roasting pan.
- Stuff the turkey cavity with onion, lemon, and garlic.
- Seal the bag with the provided tie and cut 5 small slits for ventilation.
- Roast the turkey according to weight (see time chart).
- Check the temperature: The breast should reach 165°F and the thighs 175°F.
- Remove the turkey from the bag and let it rest for 20-30 minutes before carving.
Notes
100%
- Prep Time: 15 minutes
- Cook Time: 2.5 – 3 hours
- Category: Main Course
- Method: Roasting
- Cuisine: American
Nutrition
- Serving Size: 6 oz turkey
- Calories: 320
- Sugar: 0g
- Sodium: 580mg
- Fat: 14g
- Saturated Fat: 5g
- Unsaturated Fat: 7g
- Trans Fat: 0g
- Carbohydrates: 2g
- Fiber: 0g
- Protein: 45g
- Cholesterol: 120mg
Keywords: Turkey roasted in a bag, juicy turkey, oven bag turkey, easy roasted turkey, Thanksgiving turkey, holiday turkey
1 thought on “The Ultimate Guide to Turkey Roasted in a Bag”